Texts#
Each pair of images can contain several texts:
- The first of the list is the EXIF Title (if it exists). It is also registered in .pair file
- From second text onwards, they are only registered in .pair file
Each text is associated to a matching point that determines its position. The text position in the image is the one of its matching point (including depth), plus an XYZ offset.
Text Creation#
EXIF Title#
The EXIF Title may come with the original photos, or may be created and modified in Stmani3 using the Thumbnail Group Options
An EXIF Title may be created in two situations:
- There is no .pair file: Then only the images metadata are modified
- There exists a .pair file: It associates the text to the Datum point. And also changes the metadata
When a .pair file is created and the first matching point added, if there exists an EXIF Title it is associated with this first point, which is initially Datum.
Other Texts#
They are created by selecting the matching point nearest to the position we want to place the text. Then open the Matching Point Options and click the option "Set Text". Then a window opens to write the text and other options that are covered below.
Text Options#
A text must be selected. There two ways of doing:
- Select a text in the Text List, then right-click.
- Clicking the "T" key the program enters a "Text" edition state. Then right-click on the image nearby the desired point (the pointer changes shape when
it is near a text).
Note the text operations can only be done on the right image.
Then a Text Options window opens:
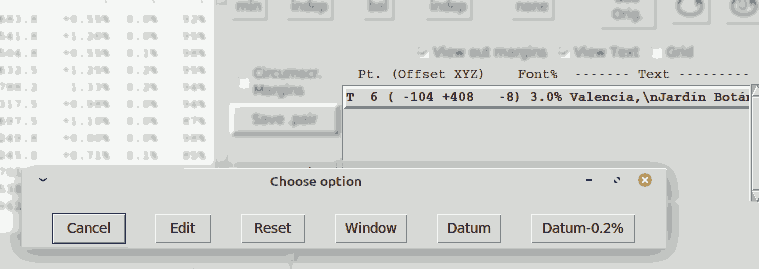
- Edit: It opens another window that lets changing the text itself and other features
- Reset: Set to zero the offset of the text respect the associated matching point (the text moves exactly to the point)
- Window: Place the text at the same depth as teh window, and near the lower-right corner
- Datum: Associate the text to the Datum point with zero offset (it is placed exactly on the Datum))
- Datum-0.2%: Associate the text to the Datum point with a Z offset of -0.2% of the width (it places the text slightly in front)
Text Edition Window#
Clicking "Edit" in the text options opens the following edition window:

- Origin Point: Lets associating to a different point.
- Font Size: Set as percentage of the image height.
- Colour: It can be white, black, white with black border, or black with white border.
- Text itself.
Available text colours:

Text Displacement#
To displace the text set the "Text" edition state (clicking the "T" key). In this state the cursor changes shape when near enough to a text, then it can be displaced in XY by dragging with the mouse, and it can be moved in depth (displaced in Z) by turning the mouse wheel.
In the GIF above note how the text reads badly at Z+84 depth, because it appears behind the scene. The best depth to place the text is "touching" the scene or slightly above.